Are you ready to take complete control of your smart home or industrial IoT setup from anywhere in the world, without the constant worry of cyber threats? The integration of Secure Shell (SSH) with Remote IoT (remoteiot) offers a robust, secure, and efficient pathway to remote device management, putting you firmly in the driver's seat of your connected world.
This in-depth exploration will serve as your comprehensive guide to the world of SSH remoteiot, meticulously covering everything from the fundamental principles to the advanced configurations that will fortify your setup. Consider the ability to update software, troubleshoot issues, and monitor performance all securely and remotely a key aspect of effective IoT management. SSH provides the bedrock upon which this remote access is built.
Let's delve into the specifics of Secure Shell (SSH) and Remote IoT (remoteiot) and what these technologies can do for you. Before we proceed with any technical depth, it's paramount to understand the core of the technology and how this technology benefits the end user. We will use a table format to give a detailed overview.
| Aspect | Description |
|---|---|
| What is SSH? | Secure Shell (SSH) is a cryptographic network protocol that provides a secure channel over an unsecured network. It's primarily used for remote login, command execution, and secure file transfer. |
| What is Remote IoT (remoteiot)? | Remote IoT can be viewed as a comprehensive platform designed for the management and control of Internet of Things (IoT) devices from a remote location. |
| SSH's Role in Remote IoT | SSH acts as a secure conduit, enabling encrypted communication between a client and an IoT device, thereby protecting sensitive data during remote access. |
| Benefits of SSH for Remote IoT |
|
| Key Features of SSH in remoteiot |
|
| Why is Secure Access Essential? | Ensuring secure remote access is a critical aspect of managing IoT devices. Without it, your devices could be vulnerable to unauthorized access, data breaches, and other security threats. |
| Use Cases |
|
The focus of this tutorial is not only on what SSH is, but how it is used in practical applications within the Remote IoT ecosystem. Whether you're setting up your first smart home system or managing a large-scale industrial IoT deployment, understanding these fundamentals is crucial.
The process starts with a solid foundation: Secure Shell (SSH). SSH is a cryptographic network protocol used for secure data communication between two computers or devices. It's the workhorse that allows you to connect to your IoT devices remotely and securely. When used with Remote IoT (remoteiot), the capabilities expand exponentially.
Consider the scenario of an IoT device deployed in a remote location, perhaps a weather station in a harsh environment or a sensor in a manufacturing plant. Without secure remote access, managing these devices would be an immense challenge, requiring physical access or vulnerable network configurations. SSH provides the solution, allowing you to:
- Monitor Device Status: Check the device's health, including CPU usage, memory consumption, and network connectivity.
- Troubleshoot Issues: Diagnose and resolve problems without visiting the physical location.
- Deploy Updates: Install new software or firmware versions securely and efficiently.
- Configure Settings: Modify device parameters to optimize performance or adapt to changing requirements.
Let's delve into the core components of SSH and how they work together within the remoteiot framework.
- SSH Client: This is the software you use to initiate the connection. Common SSH clients include OpenSSH (available on most Linux and macOS systems), PuTTY (for Windows), and integrated terminal clients in various IDEs.
- SSH Server: This resides on the IoT device and listens for incoming SSH connections. It authenticates the client and allows access based on configured security policies.
- Encryption: SSH uses strong encryption algorithms (like AES, ChaCha20, etc.) to protect all data transmitted between the client and server. This includes login credentials, commands, and data.
- Authentication: Before granting access, the SSH server verifies the identity of the connecting client. Common authentication methods include password-based authentication (not recommended for production environments), public-key authentication, and multi-factor authentication.
The initial setup is very important in any project. To establish a secure connection to your remote device, you will need to undertake a few steps. If these initial steps are done correctly, you will have no issues down the road.
To ensure your devices are secure, the initial setup requires following these steps:
- Install an SSH Server on your IoT Device: Most Linux-based IoT devices, such as those running Raspberry Pi OS or Ubuntu, have an SSH server pre-installed or readily available through package managers. Use your device's package manager (e.g., `apt` for Debian/Ubuntu, `yum` or `dnf` for CentOS/Fedora) to install and enable the SSH server.
- Configure SSH Server Settings: After installation, modify the SSH server's configuration file (typically located at `/etc/ssh/sshd_config`) to enhance security. Here are key recommendations:
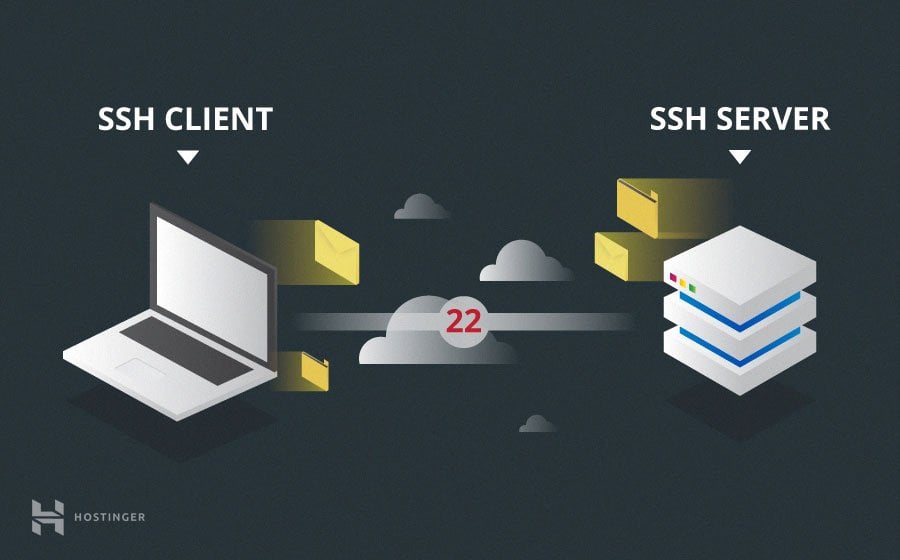
- Change the default SSH port: The default port (22) is widely known and frequently targeted by attackers. Change it to a non-standard port (e.g., 2222, 22222).
- Disable password authentication: Rely on public-key authentication for stronger security.
- Limit login attempts: Configure a maximum number of failed login attempts to mitigate brute-force attacks.
- Disable root login: Prevent direct root login via SSH. Require users to log in with a regular user account and then escalate privileges using `sudo`.
- Enable two-factor authentication (2FA): Implement 2FA for an extra layer of protection.
- Create SSH Keys: This is the process of establishing and securing keys for secure communication. On your client machine (the one you'll use to connect), generate an SSH key pair. The private key must be kept secure, and the public key will be placed on the IoT device. Use the `ssh-keygen` command to create the key pair.
- Authorize the Public Key on the IoT Device: Copy your public key (usually located at `~/.ssh/id_rsa.pub`) to the authorized_keys file on your IoT device. This file is located in the `.ssh` directory of the user account you'll be using to connect (e.g., `/home/pi/.ssh/authorized_keys`). You can use the `ssh-copy-id` command for this.
The next crucial step is configuring the remote client to access the device. After the initial setup has been completed, you will need to perform the following steps.
- Install an SSH Client: Ensure that an SSH client is available on the device from which you'll be connecting to the IoT device.
- Configure SSH Client: Modify the configuration files of the SSH client to point to the remote device. Provide the following parameters:
- Hostname or IP address of the IoT device
- Username
- Port
- Private key path
- Test the Connection: Once all parameters are set up, you can test the connection from the client to the remote device using the ssh command.
When you create a tunnel from the thing details page of the AWS IoT console, you can also specify whether to create a new tunnel or open an existing tunnel for that thing as illustrated in this tutorial. This is important for a number of reasons. One of them is that the connection between the client and the server is encrypted, ensuring data privacy and integrity. This is important for data being transferred to remote systems and devices. Consider the following security best practices to ensure your remote SSH IoT connections remain safe and secure.
Here are some crucial security measures to be followed.
- Use Strong Passwords (or Better, Key-Based Authentication): If you must use password-based authentication, choose strong, unique passwords and change them regularly. However, public-key authentication is significantly more secure.
- Implement Key-Based Authentication: Generate an SSH key pair. Protect your private key with a strong passphrase.
- Regularly Update Your Systems: Keep your operating system and all software up to date with the latest security patches.
- Monitor Logs: Regularly review SSH server logs for suspicious activity, such as failed login attempts or unusual connection patterns.
- Firewall Configuration: Configure your firewall to allow SSH traffic only from trusted IP addresses or networks.
- Disable Root Login: Prevent direct login as the root user via SSH.
- Limit Login Attempts: Configure your SSH server to limit the number of failed login attempts to prevent brute-force attacks.
- Use Two-Factor Authentication (2FA): Implement 2FA for an extra layer of security.
- Disable Password Authentication: Wherever possible, disable password authentication and rely solely on key-based authentication.
The capabilities of SSH extend far beyond simple remote access. One powerful feature is SSH tunneling, which allows you to securely forward network traffic through an SSH connection. This is extremely valuable for:
- Secure Data Transfer: Encrypting data transfers between devices.
- Bypassing Firewalls: Accessing services on the IoT device that are behind a firewall.
- Secure Port Forwarding: Providing secure access to applications running on the IoT device.
SSH port forwarding is another key feature. It allows you to forward traffic from a port on your local machine to a port on the remote IoT device, or vice versa. There are three main types of port forwarding:
- Local Port Forwarding: Forwards a connection from a port on your local machine to a port on the remote IoT device.
- Remote Port Forwarding: Forwards a connection from a port on the remote IoT device to a port on your local machine.
- Dynamic Port Forwarding: Creates a SOCKS proxy server on your local machine, allowing you to tunnel all your network traffic through the SSH connection.
Consider an example with a Raspberry Pi running a web server on port 80. To securely access this web server from your local machine, you can use local port forwarding.
- Establish an SSH connection to your Raspberry Pi with local port forwarding.
- Access the web server by pointing your web browser to `http://localhost:8080`. The traffic will be forwarded through the SSH tunnel to port 80 on your Raspberry Pi.
With an understanding of the basics, the tutorial can be expanded with several advanced techniques.
- Automated SSH Connections: Using scripting or tools like `autossh` to automatically re-establish SSH connections if they drop.
- SSH Configuration Management: Managing SSH configurations using configuration management tools.
- Integrating SSH with Monitoring Tools: Using SSH to gather metrics and monitor the performance of IoT devices.
- SSH and VPN: Using SSH over a VPN for increased security.
When combined with a robust platform, such as remoteiot, designed for managing IoT devices, SSH becomes even more powerful.
- Streamlined Workflows: Enhance your remote device management capabilities by integrating SSH with the remoteiot platform.
- Enhanced Security: Ensure secure communication by using SSH for accessing and managing IoT devices.
Troubleshooting SSH connections can often seem daunting, but a methodical approach will typically lead to a solution. First, systematically address any issues that might be present.
- Connection Refused: Ensure the SSH server is running on the IoT device and that your firewall is configured to allow incoming SSH connections on the correct port.
- Authentication Failures: Verify that your username and password (or your SSH key) are correct. Double-check that the SSH key is correctly authorized on the IoT device.
- Network Connectivity Issues: Ensure that both your client machine and the IoT device have an active internet connection.
- Permissions Issues: Make sure you have the necessary permissions to access the resources you are trying to manage on the IoT device.
To ensure the success and security of your remote IoT projects, be sure to follow best practices. If you are not following best practices, your projects are doomed from the start.
- Prioritize Security: Implement robust security measures, including strong passwords, key-based authentication, and regular security audits.
- Plan for Scalability: Design your infrastructure to accommodate future growth.
- Monitor and Maintain: Implement monitoring tools to proactively identify and address issues.
- Document Everything: Maintain detailed documentation of your setup, configurations, and procedures.
- Regularly Test: Regularly test your remote access and security configurations.
For more tutorials and resources, explore our website and stay updated on the latest developments in the IoT world! Explore the github repository for additional resources and examples.
Raspberry Pi SSH tutorial easy to follow. Enable SSH on your Raspberry Pi. Explore the github repository for examples and project specifics: Github jgome284/raspberrypiiot iot projects for the raspberry